
Welcome to Day 1 of my 30 Days of FastAPI journey! Today is all about laying the groundwork. I’m moving away from the “old way” of managing Python environments and embracing uv, the lightning-fast package manager written in Rust.
🛠️ The Setup: Faster than a Coffee Break
Instead of the usual venv and pip dance, I used uv to get everything running in seconds. Here is the step-by-step:
1. Initialize the Project
First, I created the project structure. uv handles the creation of the pyproject.toml. Then I created the virtual environment with uv venv.
uv init my-fastapi-app
cd my-fastapi-app
uv venv
2. Add Dependencies
Next, I added FastAPI and Uvicorn (the ASGI server).
uv add fastapi uvicornObservation: The installation was nearly instantaneous. uv caches aggressively, making this step much smoother than standard pip.
3. The “Hello World” Code
I created a simple main.py file to verify the installation:
from fastapi import FastAPI

app = FastAPI()

@app.get("/")
def read_root():
    return {"message": "Hello World"}
4. Running the API
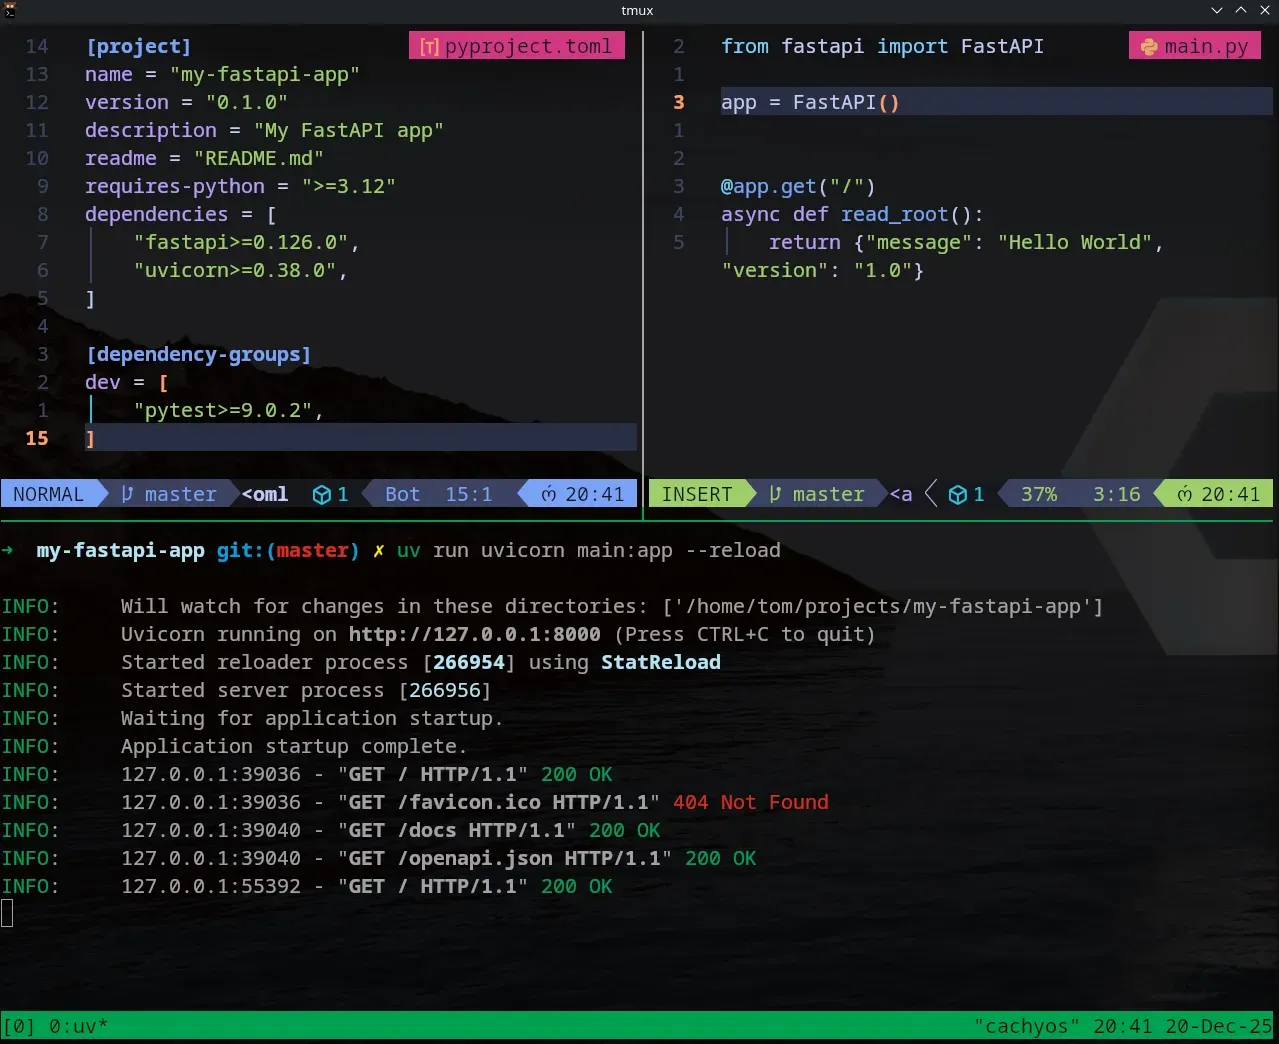
To start the development server with “hot reload” (so it updates whenever I save the file), I ran:
uv run uvicorn main:app --reload
🔍 Exploring the Interactive Docs (Swagger UI)
One of FastAPI’s “killer features” is that it documents itself. Once the server was running, I navigated to: 👉 http://127.0.0.1:8000/docs
FastAPI automatically generated a Swagger UI page where I could test my endpoint directly from the browser. No Postman required for Day 1!

📚 My Learning Resources
I’ll be sticking to these high-quality resources to guide my 30-day sprint:
- Course: FastAPI – Help You Develop APIs Quickly by Beau Carnes (FreeCodeCamp).
- Book: FastAPI: Modern Python Web Development by Bill Lubanovic (O’Reilly).
🛠️ uv Cheat Sheet for FastAPI Development
I’ll be keeping this handy throughout the month. If you are starting out, save this!
| Action | Command |
|---|---|
| New Project | uv init <name> |
| Add Library | uv add <package-name> |
| Remove Library | uv remove <package-name> |
| Run App | uv run uvicorn main:app --reload |
| Sync Env | uv sync |
| Check Tree | uv tree |
🏁 Reflection
Day 1 was a success. The combination of FastAPI and uv feels incredibly modern and friction-less. Tomorrow, I’m diving into Path Parameters to see how FastAPI handles dynamic data in URLs.
See you on Day 2!
Here is a concise uv Cheat Sheet tailored for your FastAPI workflow over the next 30 days.
🛠️ uv Cheat Sheet for FastAPI Development
1. Project Initialization
Starting a new project from scratch.
uv init: Initializes a new project with apyproject.toml.uv venv: (Optional) Manually create a virtual environment, thoughuv runhandles this automatically.
2. Managing Dependencies
This is what you will use most often as you add libraries like Pydantic, SQLAlchemy, or Jose (for JWT).
uv add fastapi uvicorn: Adds dependencies to your project and installs them.uv add --dev pytest: Adds a package only for development/testing.uv remove <package>: Removes a dependency.uv tree: Visualizes your dependency graph (great for seeing what FastAPI relies on).
3. Running Your Application
You don’t need to “activate” environments manually if you use uv run.
uv run uvicorn main:app --reload: Runs your FastAPI app in the managed environment.uv run python script.py: Runs a specific Python script using project dependencies.
4. Environment & Python Versions
uv python install 3.12: Installs a specific Python version if you don’t have it.uv sync: Ensures your lockfile and environment are perfectly aligned.
💡 How uv fits into the FastAPI Lifecycle
| Task | Traditional Way | The uv Way |
|---|---|---|
| Install Packages | pip install fastapi | uv add fastapi |
| Create Env | python -m venv .venv | Automatic (or uv venv) |
| Run App | source .venv/bin/activate && uvicorn... | uv run uvicorn... |
| Update Lockfile | pip freeze > requirements.txt | Automatic (uv.lock) |